
It’s easy to create a speed ramp effect in Avid Media Composer. Check out this short tutorial using the Time Warp Effect.
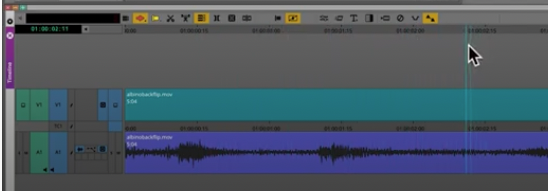
Start by parking over a clip segment that needs to be time-warped.
Look for the Time Warp effect within the Effect Palette.
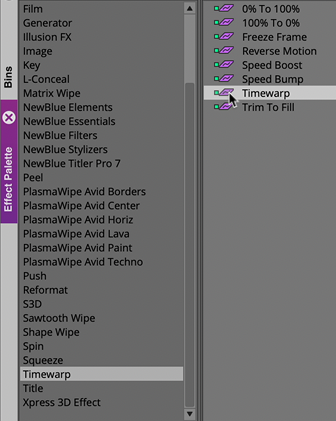
Drag the Time Warp effect onto a clip segment.
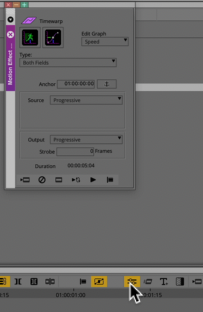
Then, click on the Effect Mode Button to bring forward the Motion Effect Editor window.
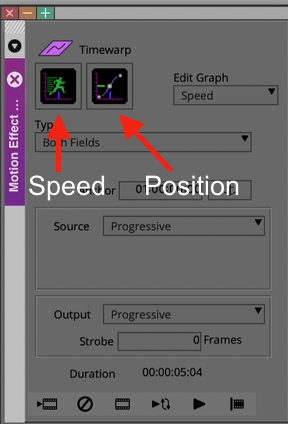
Within the Motion Effect Editor, click on the Speed and Position graph buttons. This will open the Speed and Position windows.
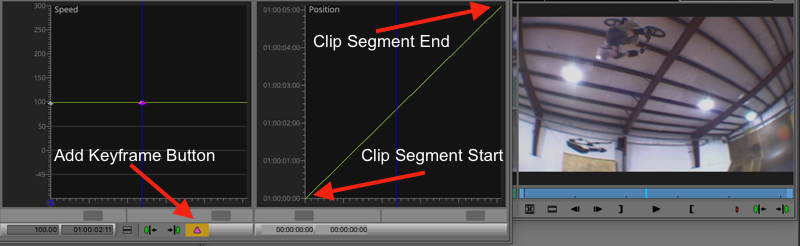
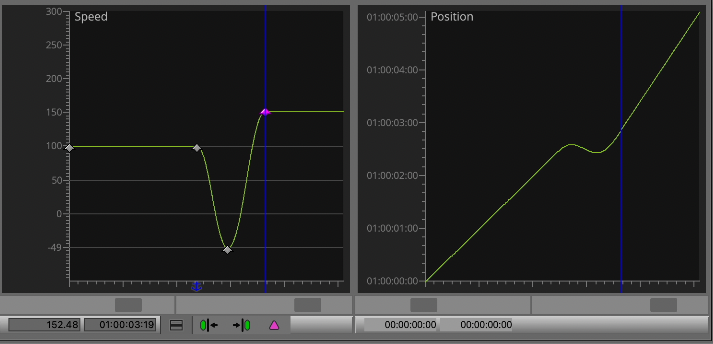
Add a keyframe on the in the Speed Graph Window.
Off to the right hand side within the Position Graph window, you will see where the clip segment starts and ends.
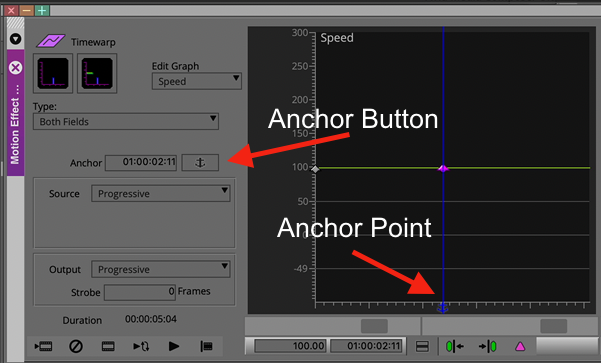
Press the Add Anchor Button to set the keyframe as an anchor point.
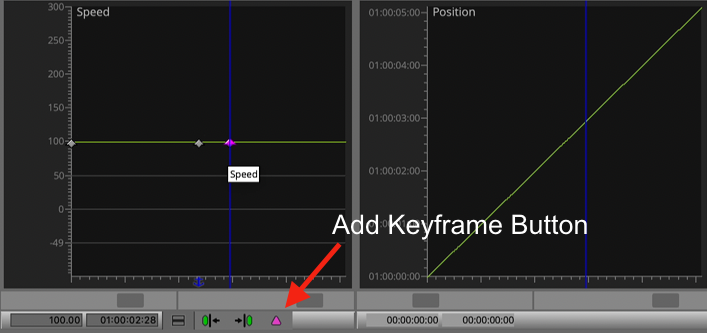
Move the blue position indicator forward 1/2 second, and add another keyframe.
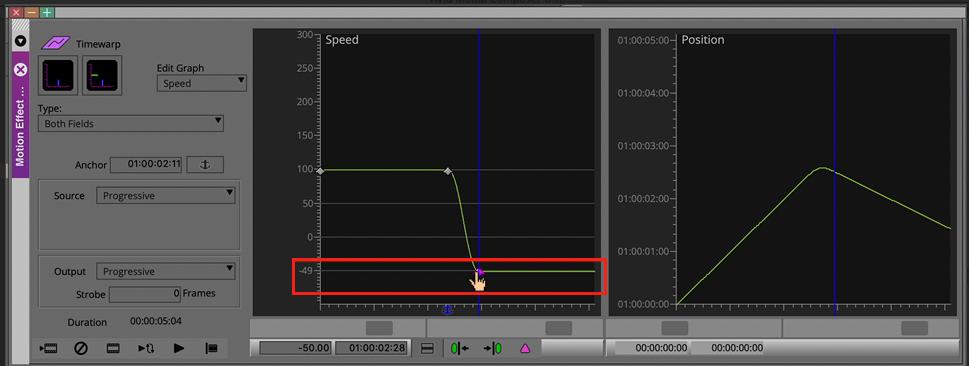
Within the speed graph window, drag the second keyframe to roughly -50% Percent. This will cause the video clip segment to play backwards.
Notice how the position graph slopes downward based on the -50% speed change.
Then move the position indicator forward another half second forward and add another keyframe.
Move the third keyframe up until the position graph lands in the upper right hand corner.
That’s it, go ahead and play the sequence!
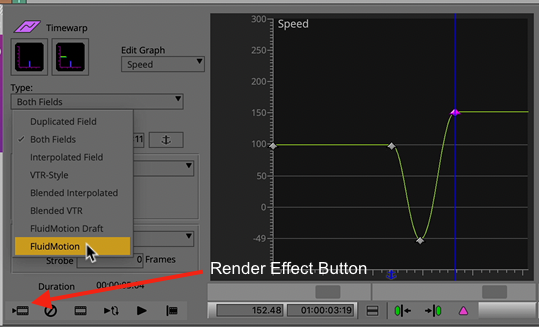
For extra smooth slow motion, set the render type to Fluid Motion. If you choose this option, you will need to render the effect.
You can watch the Time Warp YouTube Tutorial here.