
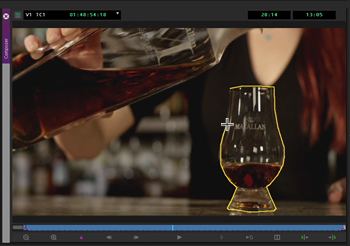
It’s easy to clone areas of a video image by creating a Matte Key within Avid Media Composer.
Watch this Media Composer tutorial on how to create a Matte Key.
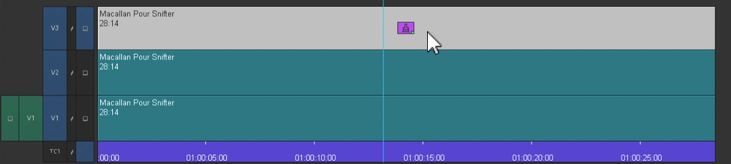
To start, select a clip segment in the timeline and then hold down the option/alt key and press the Up Arrow Twice.
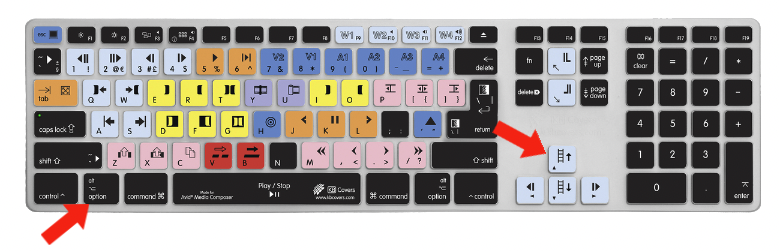
This will duplicate the clip segment on top of itself two times.
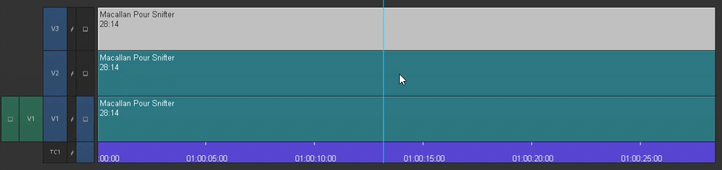
Next, make sure the V3 track is turned on, and the Monitor Icon is placed onto the V3 Track.
Navigate to Effects Palette and find the Paint Effect with the Image Category.
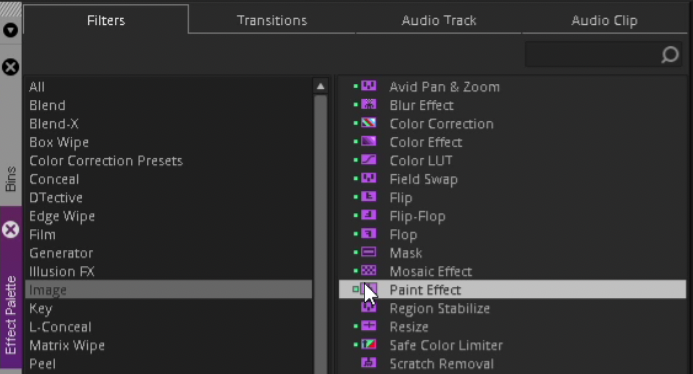
Place the Paint Effect onto the V3 Segment within your sequence.
Then enter into Effects Mode. This will bring forward the Effects Editor Window.
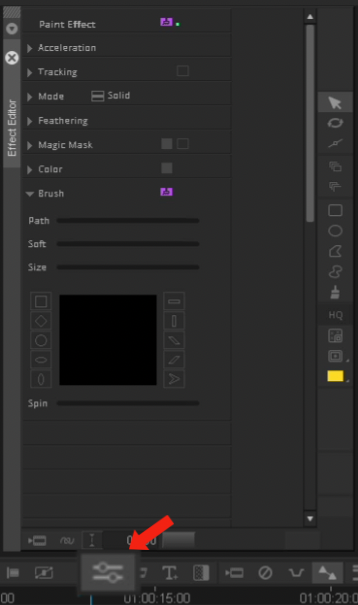
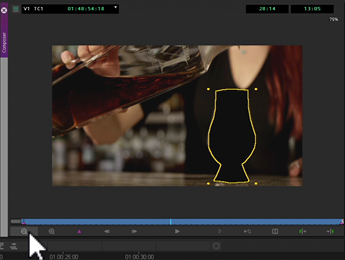
Navigate to the Effect Editor Window and click on the Poly Tool.
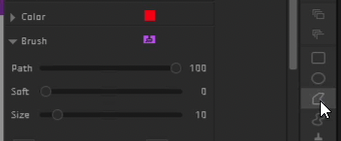
Change the Color of the Poly Tool Mask from Red to Black
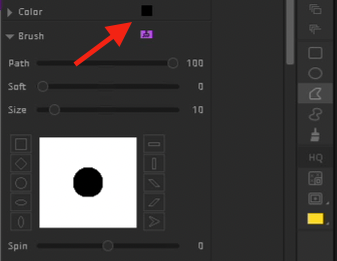
Draw a black mask around area to be cloned.

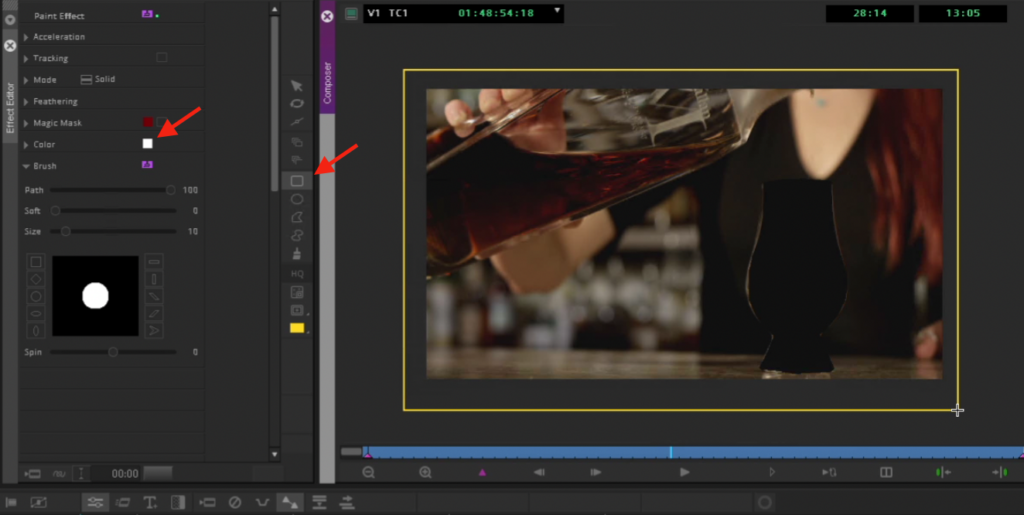
Then, click on the reduce button in the right corner (or CMD/CTRL K) so you can see outside to visible picture area within the Composer Window.
Navigate back to the Effect Editor Window and click on the Rectangle Tool. Change the color of the Rectangle Tool to White. Draw a white square around the entire visible picture area.
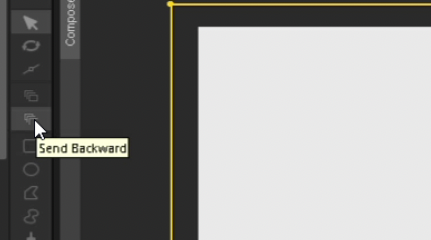
After you Draw the Mask, it will cover over the Black Shape that you made earlier. Click on the Send Backward button within the Effect Editor Window
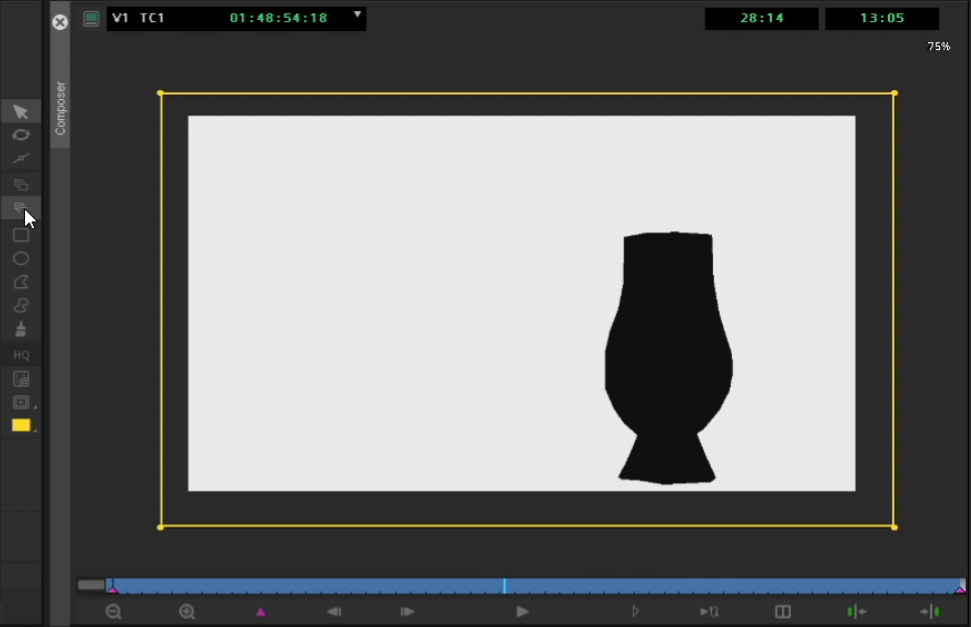
The end result with be a Black and White Matte.
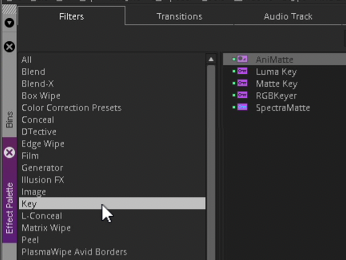
Navigate back to the Effect Palette, and find the AniMatte Effect within the Key Category.
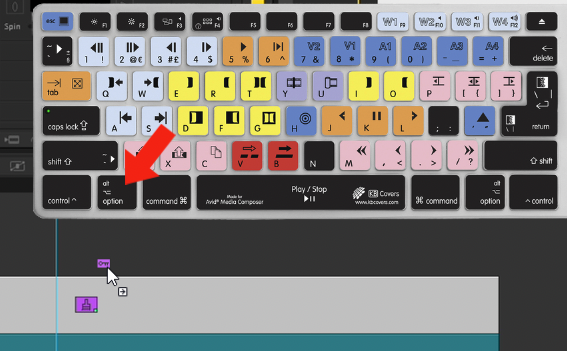
Hold down the ALT/OPTION key and drag the AniMatte effect onto the clip segment that’s on V3.
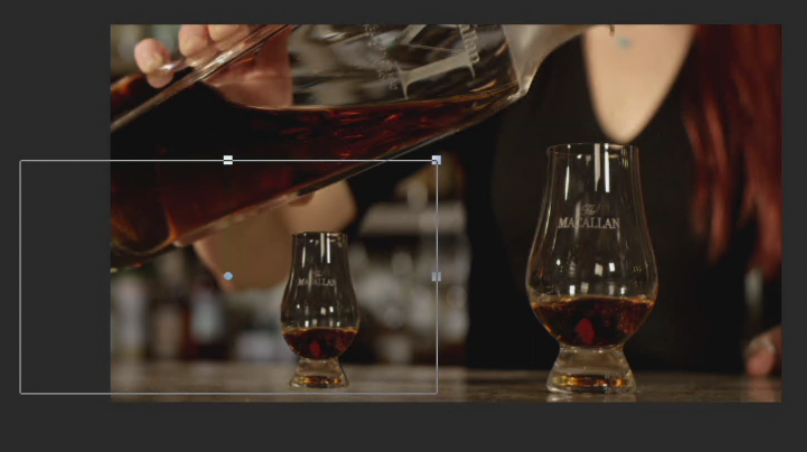
The last step is to resize your Matte within the Composer Window. That’s it!
If you enjoyed this tutorial, please subscribe to our YouTube Channel.