Category Archives: Avid Media Composer

Media Composer Blend Modes

Check out this short tutorial on how to use Blend Modes within Avid Media Composer!

If you want to experiment with a graphic that has an Alpha Channel, you can download the GeniusDV logo.

Click on Image and/or Link and then right click to save GeniusDV Logo with Alpha Channel

If you are new to the concept of blending modes, there are some great websites that explain in great detail on how powerful blending modes can be.


Blending modes were traditionally geared towards working with still images. However, they provide some amazing capabilities when used with video clips.

For compositing modes to work, you need some cool backgrounds that will affect the blend of the two video layers. Footage of Fire, Water, Clouds, and Lights make for great composites as a base layer.

You can download a Free Media Composer AVX Blending Mode plug-in that provides real-time blending modes within Avid Media Composer. There are no strings attached. Click on the link above and install the plugin.

After you install the Blending Mode AVX plug-in, make sure you restart Avid Media Composer.

I’ve tested the plugin with several versions of Avid Media Composer, including up until the 2020.4 beta.In the Blending Mode Tutorial, I’m using a graphic with an Alpha Channel. However, you can use any graphic and/or foreground to blend with a layer below it.

 It’s easy to create dynamic effects using blending modes in Avid Media Composer.

Take a basic logo and turn it into something like this….. with just a few clicks.

A blending mode provides effect options for how a base layer,  is affected from a layer directly below it. Blending modes requires at least two video layers.

Edit any two clips directly on top of each other. Make sure the V2 sequence record track and the V2 Monitor Icon are both turned on in the timeline.

Two Video Tracks are Required with V2 track enabled along with Monitor Icon.

Next, drag the blend-x effect onto the V2 track. You can use either Blend X Generic, or Blend-X Alpha Advanced.

Use Blend-X Alpha Advanced if you are working with a graphic that contains an Alpha Channel. An Alpha channel means that your graphic or video clip contains areas that are transparent.

However, for this tutorial, DON’T worry, just edit ANY two clips directly on top of each other.

In General, Alpha Channels are shown as a checkerboard pattern that shows the transparent area.

If you’re not familiar with Alpha Channels, consider taking any Avid GeniusDV video editing course, and we will walk you through the process.

Navigate to the Tools menu and select the Effect Palette. Look for the Blend X category under the filters tab.

From the effect palette, drag the Blend-X Generic or Advanced plugin onto the clip segment that on V2.

Then click on the effect editor icon at the top of the timeline window. The icon looks like a pair of ‘seatbelts’.

Effect Editor Button

This will launch the Effect Editor Window.

Within the Effect Editor Window, choose a blend mode. In this example, I chose Darken.

Choose a Blend Mode – Darken

NOTE: If you are using a graphic with an alpha channel on V2, make sure you choose Alpha Matte from the Alpha Processing area.

Choose Alpha Matte from the Alpha Processing area within the Effect Editor Window

That’s it! It’s that simple. Here’s a still from the final result.

Final Result Using Blend Mode – Darken within Avid Media Composer

Media Composer Window Font Sizes

If you’re new to Media Composer 2019.X, there is a new feature where you can adjust fonts and font sizes for each individual primary Media Composer Windows.

You can now adjust the font type and size for The Composer Window, The Timeline Window, and the Bin Container Window.

So for example, I recently upgraded Avid Media Composer System, and the fonts were too small to read within timeline window.

Super Small Fonts within Avid Media Composer Timeline
  • Select a primary Media Composer Window.
  • Navigate to the Windows Menu and Select Sent Font
  • Choose a new Font (i.e, Arial) and a Font Size
Set Font Size for Media Composer Window
Set Font Type and Size for Avid Media Composer Timeline Window
Adjusted Font Sizes for Media Composer Timeline

Thanks to Avid for implementing features like this that don’t seem like much. But believe me, some time the most simple features go a long way in terms of improving efficiency.

Media Composer bin container

Learn the basics of using Bin Containers within Avid Media Composer.

Basic Introduction to Media Composer Bain Container

This tutorial video is a super basic introduction to using a bin container with Media Composer.

Here are a a couple of key features that may be foreign to even the most seasoned Avid user that hasn’t had the opportunity to upgrade to MC 2019

  • The is no longer a project window within Avid Media Composer
  • The Bin container is now the heart of of the software. You must always have at least one bin container open.
  • You can have multiple bin containers, but they are essentially clones of each other. This concept may seem odd. However, multiple bin containers may be useful for different container ‘views’
  • Also, it’s critical to understand the difference between dragging a floating window into the main interface panel, vs another window that already has a tab. So, that’s why I’ve reinforced the concept of holding down the alt/option key when dragging a floating panel into another window.

Hold down the ALT/OPTION key to attach multiple tabs to the same window. You will end up with something like this:

Multiple Tabs within ONE single bin container

If you don’t hold down the ALT/OPTION key when re-attaching to windows that already have a tab. You end up with something like this:

Multiple Windows INSIDE the same container

I’ve been using Avid Media Composer full time since 1992. I can see how this new interface will take seasoned Avid Editors awhile to get used to. The new Avid 2019 interface now looks more like DaVinci Resolve and Premiere.

Media Composer 2019 Interface Windows

https://youtu.be/Z9Wlqqir6RM
Basic Introduction to Avid Media Composer 2019.X Interface Windows

This is a VERY basic introduction to the new interface of Media Composer 2019.X.

For Avid users who haven’t experience the new interface design, DON’T worry, All your favorite Media Composer editing techniques haven’t changed.

I anticipate this new interface will take a year or more to eventually be adopted by mainstream editors.

In the near future, look for many more tutorials that cover the critical fundamentals for learning Avid Media Composer 2019.X

For seasoned Avid Media Composer users that aren’t used to the new interface, you will notice there is no longer a Project Window.

The bin container is the new heart of Media Composer. The old Project Window settings can be found under the File Menu / Preferences.

No Media can be written to any mounted Drive

When running software products such as Avid Media Composer,  if you receive an error that says No Media can be written to any mounted drive.


In attempting to correct the problem, you may encounter a Mac OS X message that says  ‘The Operation can’t be completed because you don’t have the necessary permission’.

This error flag results from your software attempting to write files to the root level of your system drive.  Apple purposely protects files on the system drive to avoid viruses and other vicious programs that may compromise the operating system.

Please Note:   It’s not normally recommended that you write media to the system drive.  However, there are several scenarios where you may not have external storage.

#1-  First Step :  Right click (or control click) on your system drive and choose get info.

Click on the orange lock in the bottom right corner of the Mac HD Info dialogue box. (see graphic below). Then type in your Mac OS X user password.

Change the permissions for the internal system drive to Read & Write for the wheel and everyone.

*Side note: If your Mac OS system user does not have an assigned password, Mac OS X may prevent you from changing the permissions.  If this is the case, go to your system preferences and assign yourself a password.

Now, you may encounter that dreaded message that says ‘The Operation can’t be completed because you don’t have the necessary permission. Super frustrating!

If this happens, here’s the fix:

#2- Second Step: Reboot the Mac, and immediately hold down Command + R. Wait for the the Mac OS to boot into recovery mode.

After it boots into recovery mode, navigate to the utilities menu and choose terminal.

From the terminal prompt:  Type: ‘ csrutil disable‘  within the terminal window.

Then reboot the machine.  Then you will be able to adjust the permissions for the ‘wheel’ and ‘everyone’ so certain third party software products can access the root level of the system drive.

Please note:  I recommend re-enabling the System Integrity Protection to prevent accidental or vicious attacks against the Mac OS X operating system.

To do that:  Repeat the same process of booting into Recovery Mode (Command = R) and type ‘csrutil enable‘.

Free Version of Avid Media Composer

GeniusDV recently took a test drive of Avid Technology’s FREE version of Avid Media Composer.  The free version is  called ‘Avid First

The free version is FULLY functional with some limitations.  From what I’ve discovered, the free version is perfectly suitable for learning Avid Media Composer.  However, full-time editing professionals will certainly want to upgrade to the full version of Media Composer.

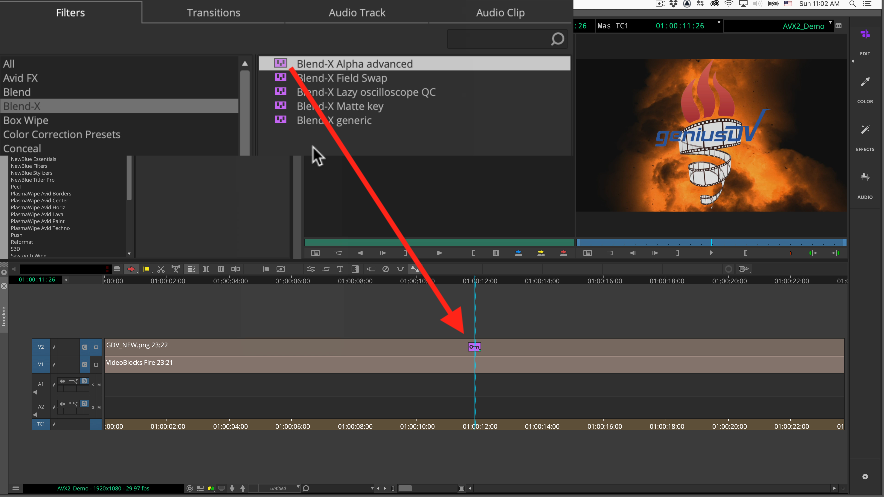
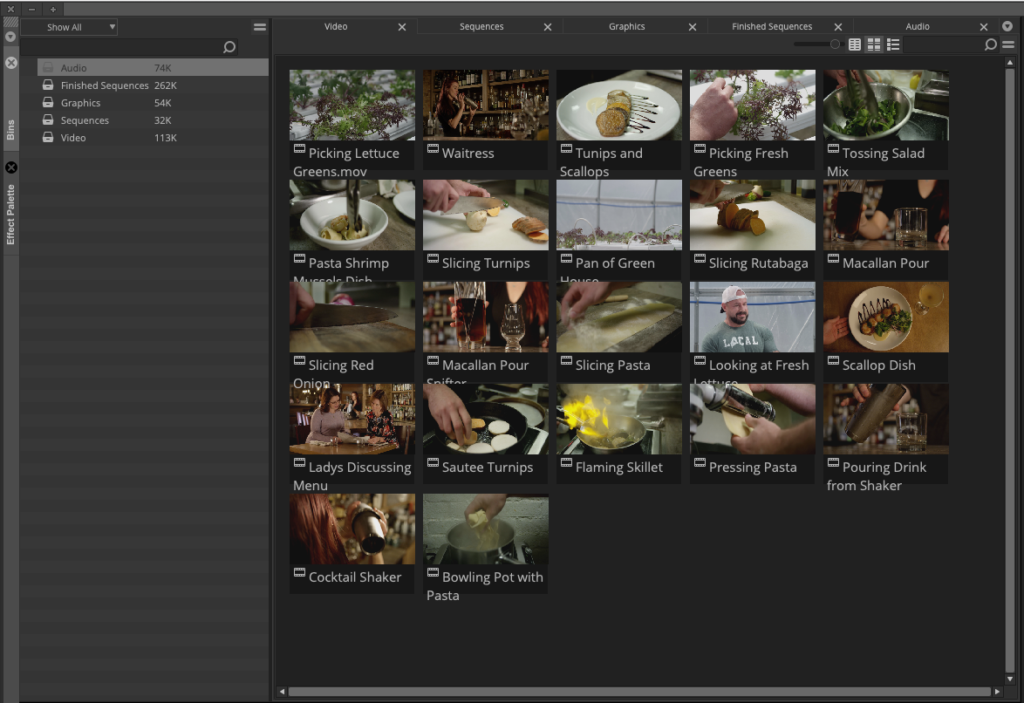
Surprisingly, the free version of ‘Avid First’ provides almost every editing feature available within the paid version of Avid Media Composer.

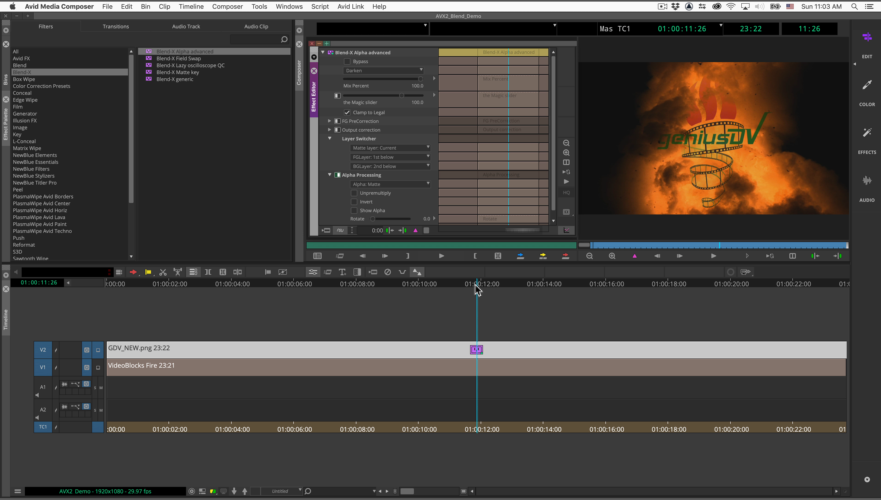
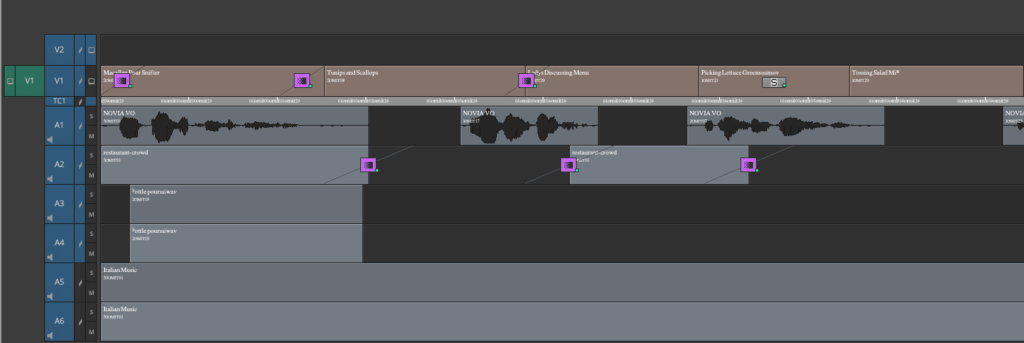
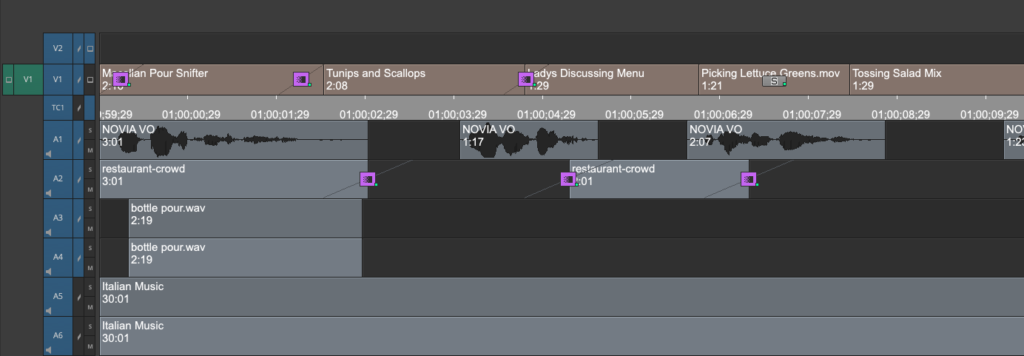
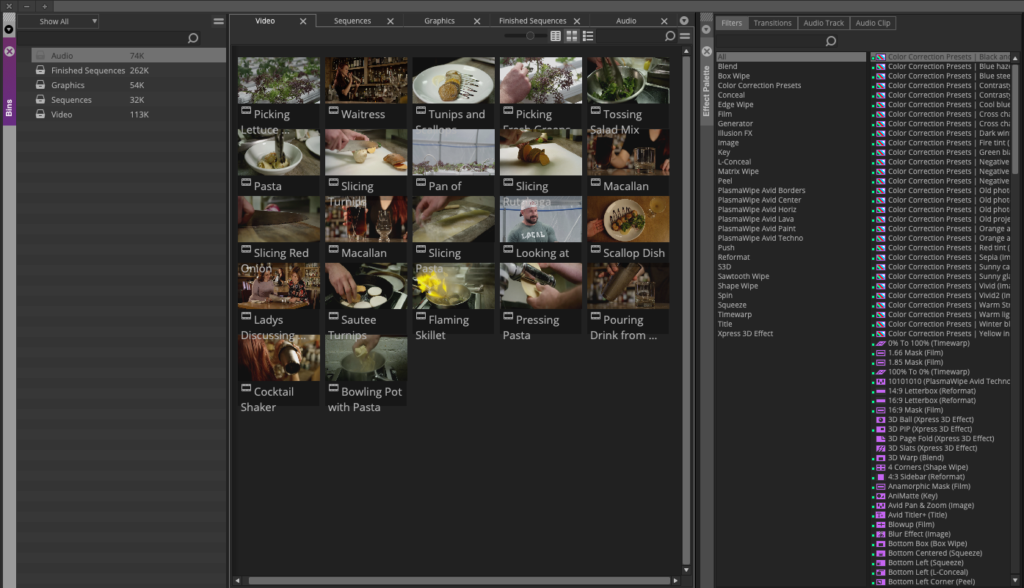
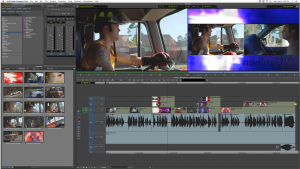
I was able to edit an entire commercial with multiple video tracks, titles, voice-over, music, and sound effects within 30 minutes.

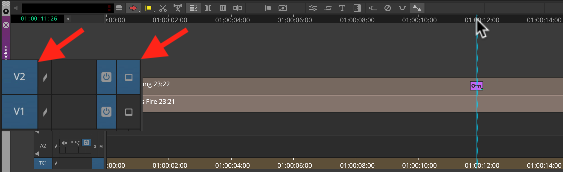
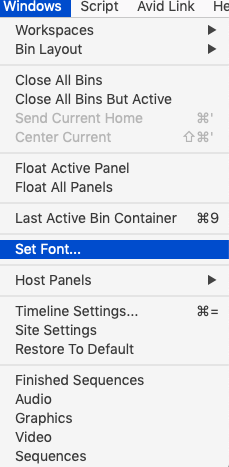
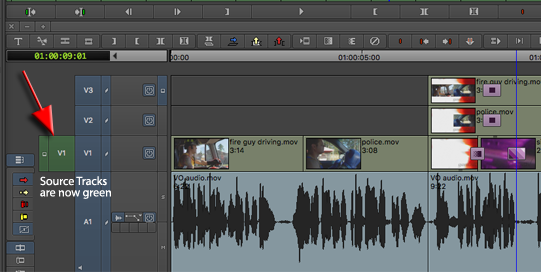
In some ways the ‘Avid First’ interface has been refreshed.  Simple things have been changed.  For example, the source tracks now appear in green.  This helps differentiate between source and record tracks.

All of Avid’s powerful editing functions are included with ‘Avid First’  including (trim mode, replace edit, match frame, top/tail editing, etc.)

Other advanced features included within ‘Avid First’ include:

  • Flame Flex (ability to reference 4K + files)
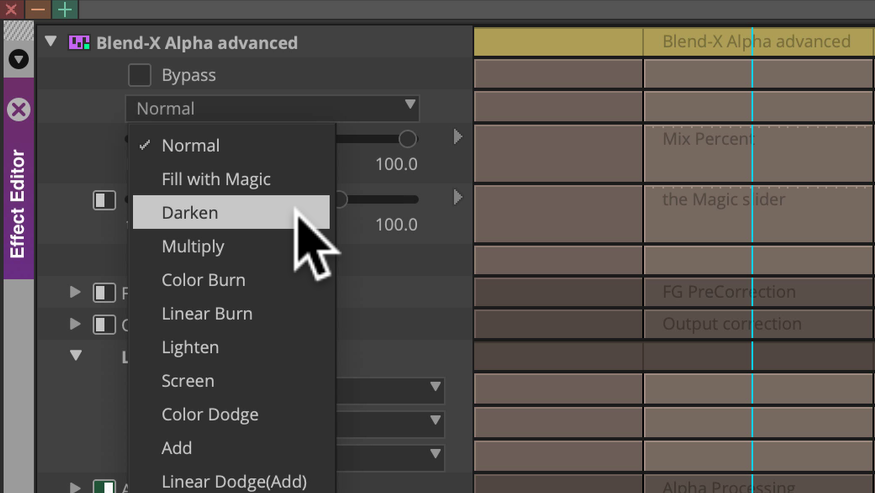
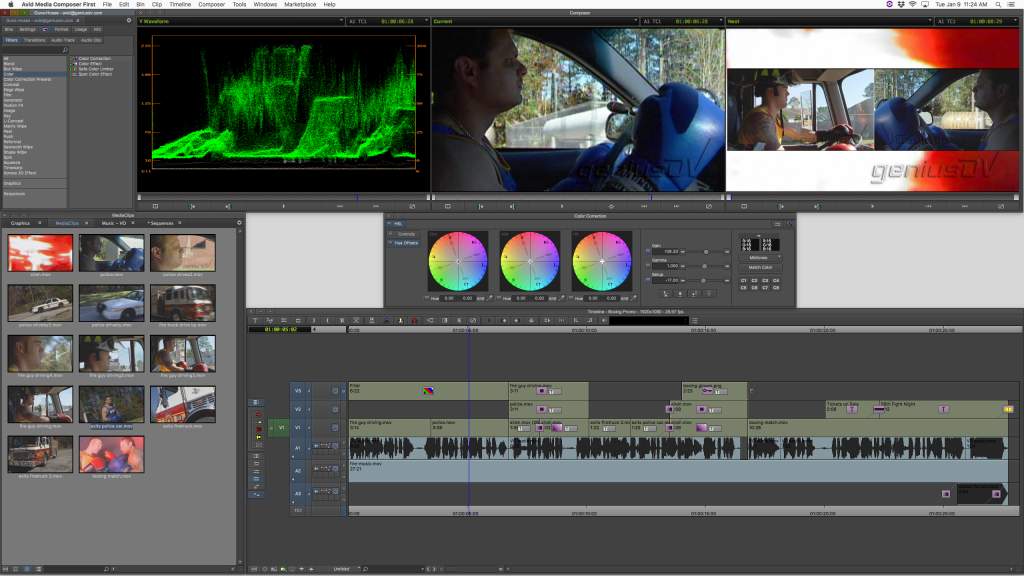
  • Full Color Correction Workspace
  • 3D Warp Controls
  • Advanced Keyframing
  • Animated Paint Controls
  • Nesting and Collapsing of Tracks (which essentially  negates the limitation of 4 video tracks.)
  • Customization of the Interface and Window Views
  • Keyboard Mapping
  • Advanced Audio Keyframing Controls

If you are considering learning Avid Media Composer, downloading ‘Avid First’ is an absolute must to become familiar with the editing interface.

Limitations of the free version that I’ve discovered include:

  • Maximum number of video tracks – 4
  • Maximum number of audio tracks – 8
  • Limited Multi-Cam editing (angles only available in source window)
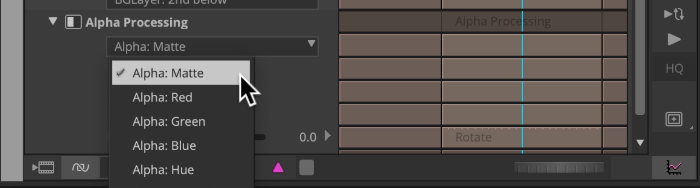
  • Limited Chroma Key Capability (no spectra matte)
  • Only the basic ‘legacy’ Title tool is included (no Marquee option)
  • No ability to animate mattes
  • Limited slow motion capabilities (no Time Warp functions)
  • No Plasma Wipe Transitions
  • Limited options for transcoding media
  • Limited to editing in HD resolution (no 4K format option)
  • Limited Real-time Audio Plugins
  • No audio punch in feature (meaning – the ability to record audio directly to timeline)
  • Limited User Settings (no ability to create additional user profiles)
  • Bins from ‘Avid First’ cannot be opened up in the retail version of Avid Media Composer.
  • You cannot have ‘Avid First’ and the full retail version of’ Avid Media Composer’ installed on the same system.

I’m sure there are some other minor limitations that I have not come across.  Feel free to leave a comment if you find specific items that are missing from the full version of Avid Media Composer.

Then, when you a ready to become an Avid Certified User, take a look at GeniusDV’s certified Avid Media Composer Training Options.

Make sure you read the list of Avid’s minimum system requirements before downloading the software.

Installing the free version of Avid Media Composer is a bit tricky.  Here are the steps:

  • Navigate to the ‘Avid First’ website at:  http://www.avid.com/media-composer-first. Click on the orange ‘Get it now for free’ button in the upper right corner.
  • Create an Avid Master Account
  • Log into your email and Verify your email address
  • Tell Avid Technology about yourself, and then Download the software.

Navigate to your downloads folder and install the ‘Avid First’ software.

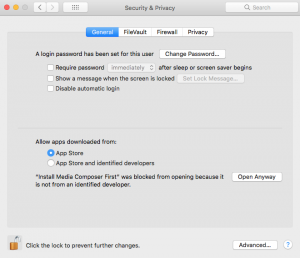
Note: If you are running ‘Avid First’ on a MAC, when you attempt to un-compress the .dmg file you will need navigate to your security preferences.

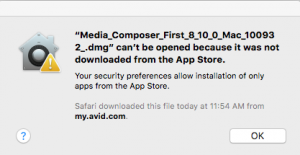
Navigate to the system preferences,  and choose Security and Privacy.  Within the General tab, click on the button that says Open Anyway.

After the .dmg is uncompressed, You will need to repeat this process again in order to launch the ‘Avid First installer’

After everything is  installed, you need to make sure you launch Avid’s Application Manager in order to run ‘Avid First’

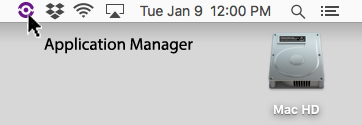
Note:  You must have a live active internet connection to log into Avid’s Application manager to run ‘Avid First’.

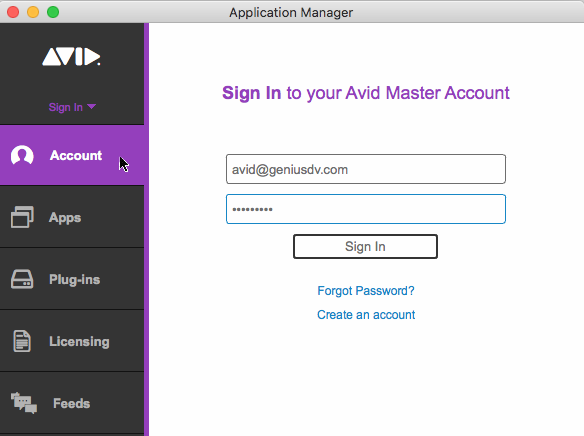
If you lose your internet connection, ‘Avid First’ will automatically close on you.


End of Final Cut Pro 7 with High Sierra

Yes, it’s true.  If you update to High Sierra, the Final Cut Pro  7 Studio Applications will no longer launch.  This also includes applications such as SoundTrack Pro, etc.


If you upgrade to Mac OSX High Sierra,  it’s very difficult to revert back to an older OS X version.

This will force users who have been hanging onto Final Cut Pro 7 to move onto other software products.

Apple is forcing Final Cut Pro 7 Studio users to move to Final Cut Pro X.

If you are still an active Final Cut Pro 7 user, DO NOT upgrade to High Sierra if you need access to current or legacy Final Cut Pro 7 projects.

With that being said, consider using GeniusDV training services to migrate to other video editing software products. We currently  offer hands-on, and online courses for:

Missing Pro Res Export Options

If you are running Avid Media Composer and/or Adobe Premiere and you are missing the Pro-Res Export options within Mac OS X.  There is a fix!


  • Download the new Pro Video Formats from Apple.com

http://support.apple.com/downloads/DL1898/en_US/provideoformats.dmg

  • Reboot the computer in safe mode by holding down the shift key immediately after you reboot the computer.
  • Waiting for the operating system to load in ‘safe mode’
  • Then double click on provideoformats.dmg to install.

Missing ProRes Video Codecs

Special thanks to Ed Gfeller for all his research for this information. You can reach out to Ed by checking out his last two documentaries:

Grover Professor of Books
The Langford Resort Hotel Winter Park, FL